Dynamics 365 F&O: Configure an environment to send email via the Graph API
Overview
This article describes the steps required to configure a D365 F&O environment to use Graph email.
Graph email is the modern replacement for the Exchange integration, and is recommended over SMTP where possible.
D365’s permission to send email on behalf of a user account via Graph is managed by creating, and assigning permission to, an App registration in Azure.
Once the App registration is created and configured, the Email parameters are updated in the D365 F&O environment, and a test email can be sent.
The step-by -step guide is an extension of the main documentation, which can be found as part of a larger email configuration Microsoft learn article, here: https://learn.microsoft.com/en-us/dynamics365/fin-ops-core/dev-itpro/organization-administration/configure-email#send-email-with-microsoft-graph
Create the App Registration
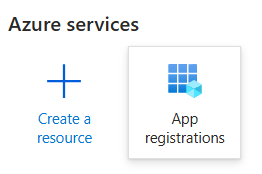
In Azure portal, https://portal.azure.com/, browse to or search for App registrations.
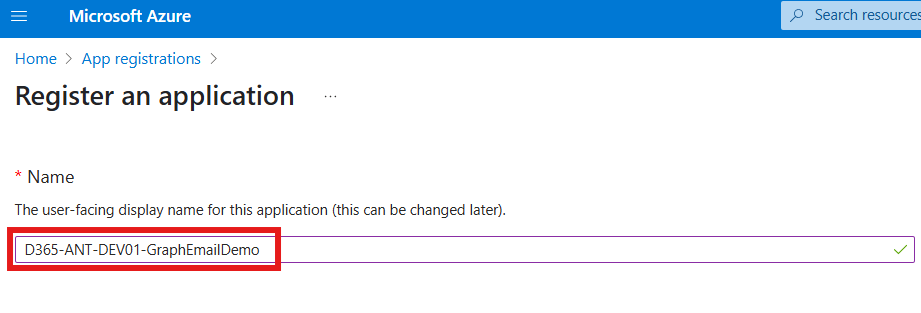
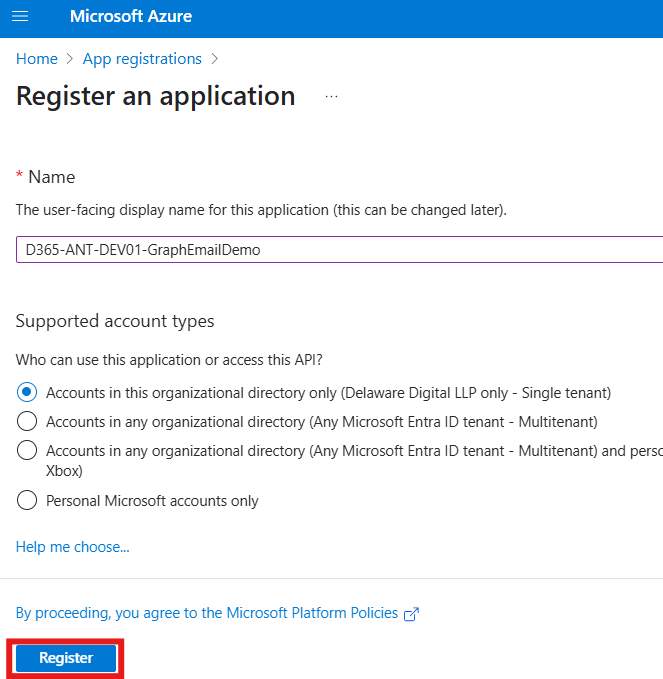
Enter a name, and leave the other fields at their default. In my case it was Single tenant, and blank Redirect URL.
Click Register.
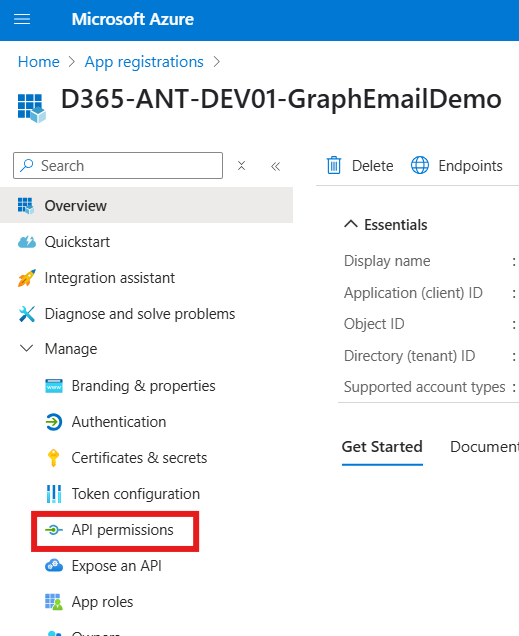
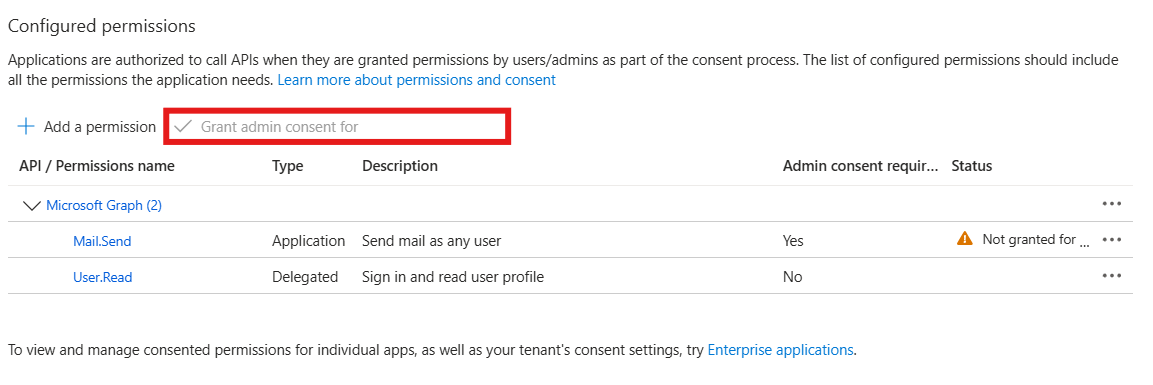
With the new App registration open, expand Manage, and then select API permissions.
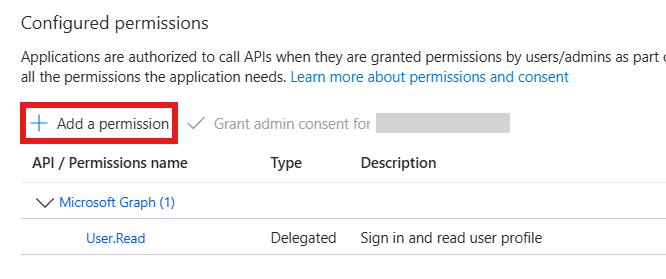
By default, the Graph User.Read permission is already added. We need to keep that, and also add the Graph Mail.Send permission.
Click on Add permission.
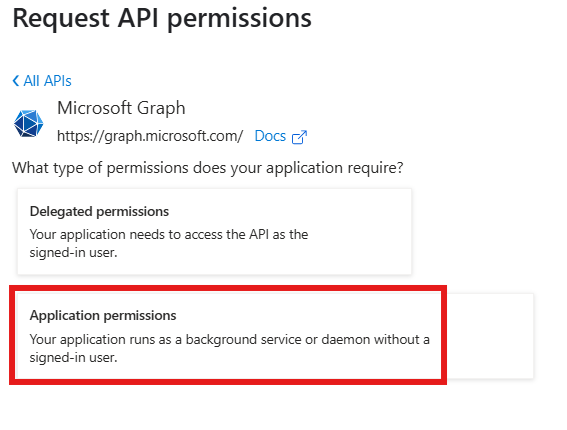
The Request API permissions window will open on the right. In Microsoft APIs, find Microsoft Graph. It should be at the top of the list, and look more like a banner than one of the options, like this:

On the next page, select Application permissions.
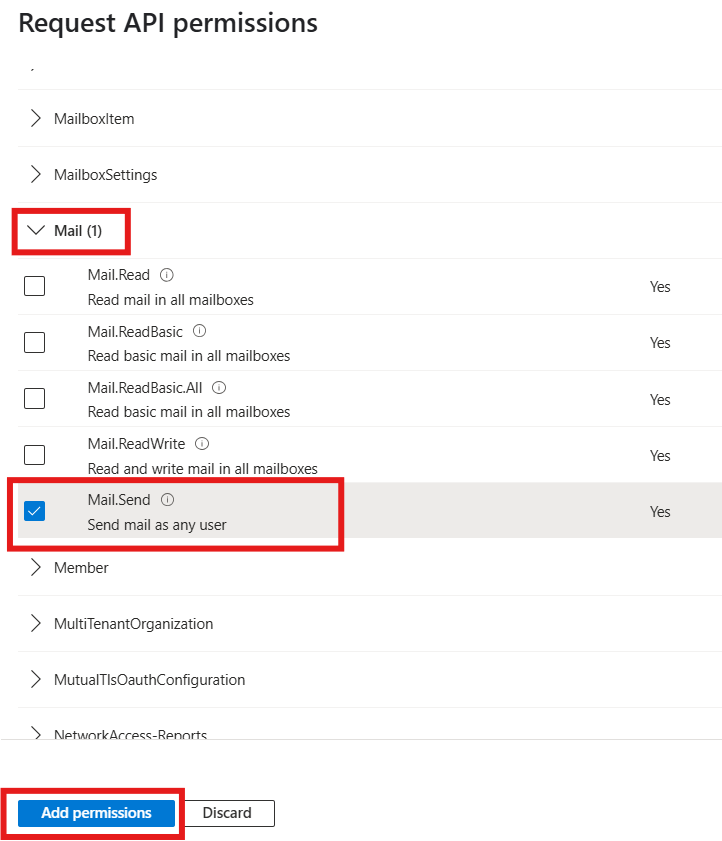
The permission selections will appear below. Search or browse to Mail, expand the tab, then check Mail.Send.
Finally, click on the Add permissions button.
Admin consent is required for an app to use these elevated permissions. If you have permission, the Grant admin consent for tenant button below will be available. If you don’t have permission the button will be greyed and unavailable. Send a request to your tenant admin, and they can click it for you.
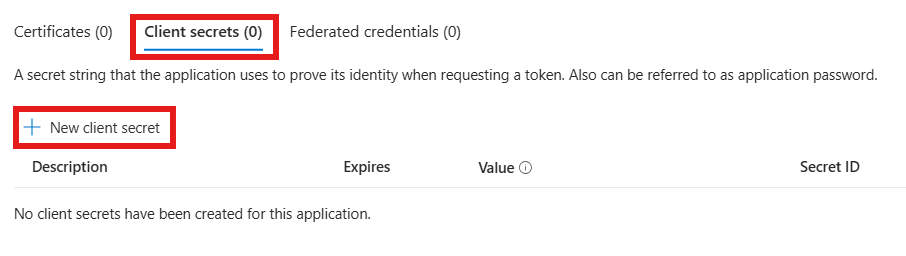
Next, with the App registration open, also in the Manage menu, browse to Certificates and secrets.
From the Client secrets tab, click New client secret.
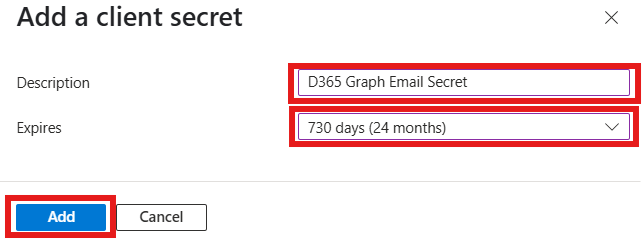
Enter a name for the secret in the Description field, and chose an expiry date in the Expiry field. Secrets have a max life of 2 years, so keep that in mind, a new secret will be needed after this one expires. When the fields are complete, click the Add button.
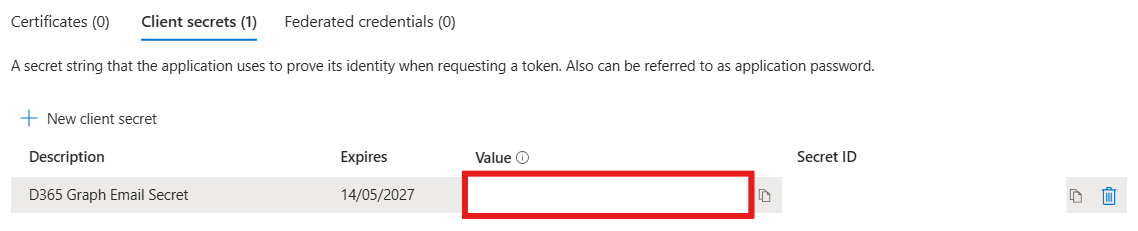
The new secret will display in the table on the Certificates and secrets page. Select it, and take a copy of it from the Value field.
Save this secret field in your favourite password manager, or keep the page open ready to copy to D365 later.
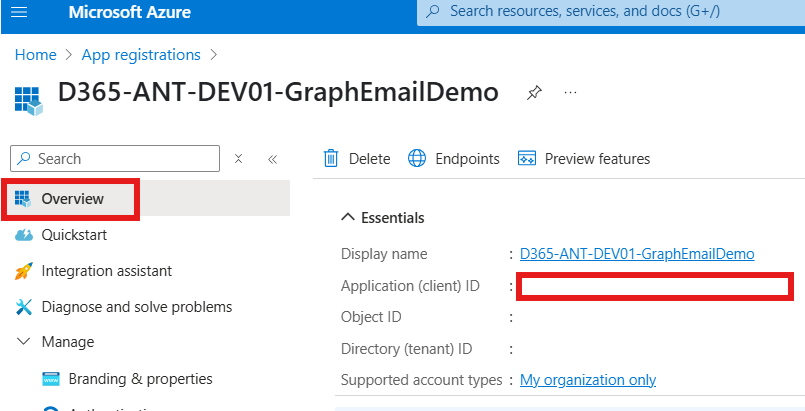
The other field you need to take a copy of from the App registration is the Client Id.
Return to the Overview page for the App registration, and copy the field Application (client) ID. As with the secret, store in your password manager, or keep open to copy to the D365 config later.
Setup in Azure is now complete.
Configure the Environment
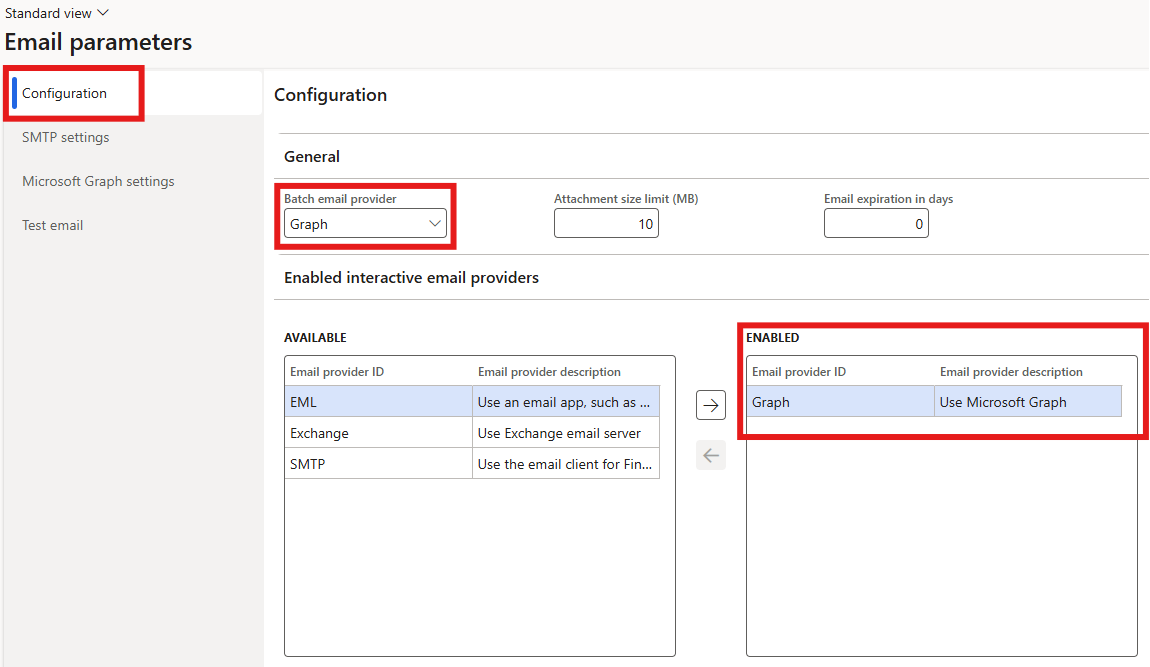
In your D365 environment, open Email parameters. Either browse to System administration -> Setup -> Email -> Email parameters, or use the search bar.

In the Configuration tab, set the Batch email provider field to Graph, and ensure Graph is enabled for interactive email by moving it to the enabled list.
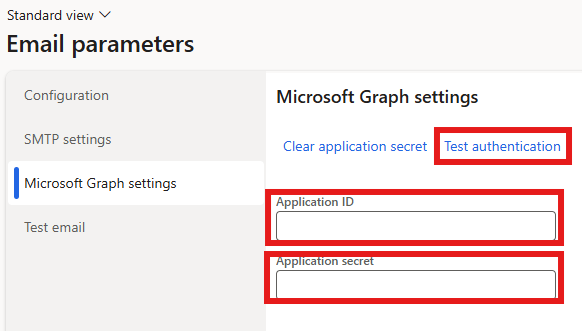
Browse to the Microsoft Graph settings tab.
In the Application ID field, paste the Application (client) ID field from the App registration page in the Azure portal, or password manager.
In the Application Secret field, paste the Client secret from the Value field of the client secret created earlier, either from the Azure portal or password manager.
Click Test authentication to validate the credentials against the Azure App registration.
To send a test email, browse to the Test email tab. Select the Graph in the Email provider field, and enter an email address in the Send to field.
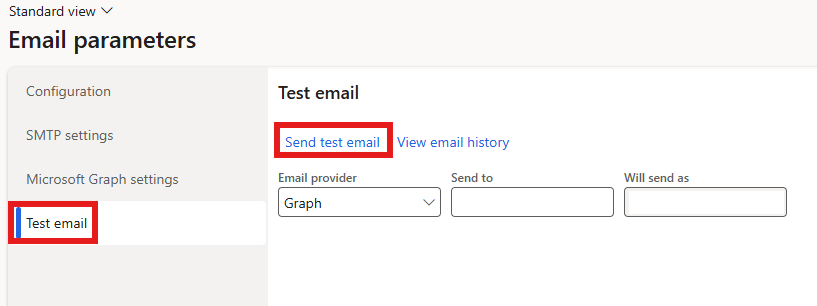
Note that the Will send as field is the email address set in the Sender email field in User options, under the Account tab, for the user currently signed in. The user must have a mailbox, or must have permission to send from the mailbox set in this field.

Once Send test email is clicked, a message should appear to confirm the email has been sent, and the recipient mailbox shout receive a test email from the mailbox set in the Sender email field in User Options.
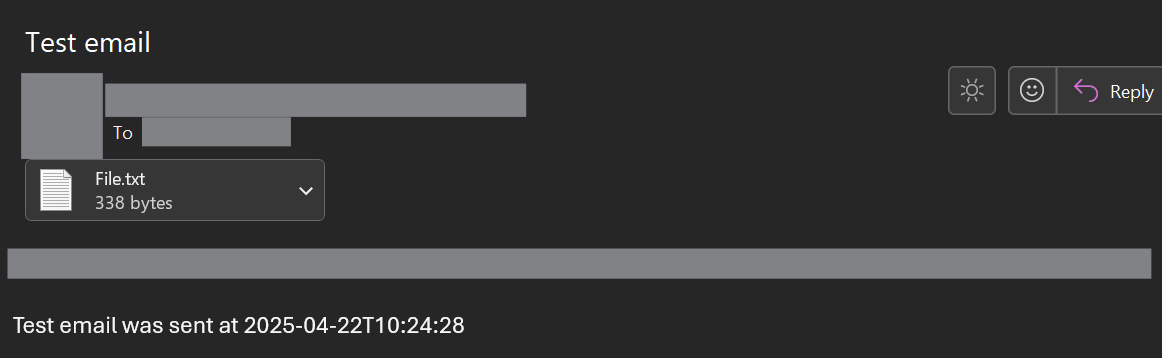
The File.txt attachment will just contain the From:, To:, Subject:, and Body: fields, as text.
Graph email setup is complete!
Additional Information
There are a couple of notes regarding Database refreshes. Email addresses are wiped on database refreshed to Tier 2 environments. This is automated, and achieved by clearing them from the LogisticsElectronicAddress table.
Additionally, the Application secret field is wiped from the Graph Email config on refresh, so reinstate it if you wish to continue to use Graph email, from the Azure portal or your password manager.
The process to refresh the production environment ahead of go-live is an exception to this rule. Email addresses will be retained.